Car bumper scratches can seriously cramp your style and make an otherwise beautiful car look pretty unsightly. What’s worse is that these pesky scratches are easy to get, especially when we’re in parking lots and back into those hard-to-see posts or curbs. Bumpers are an important part of vehicle safety and have been designed to absorb the impact of smaller collisions to protect your vehicle and (hopefully) diminish costly repairs. Since they take a lot of flak, they can sometimes get pretty scuffed and are often in need of some serious TLC.
However, do not despair if you are in need of a car bumper make-over because our tips will take you from a bust-up bumper to a beautiful one. You don’t have to spend a fortune to get rid of unattractive scratches, and with the right knowledge and correct tools, you can fix many of these issues yourself and avoid those costly bills at the mechanic. Most modern bumpers are made from plastic and fixing them should be a breeze if you have the necessary tools and some patience.
Any type of bumper scratch fix is going to require sanding, painting, sculpting, and some grinding. It might be a bit of work, but we promise it’s worth the effort. Follow our suggestions, and you’re bound to become a total pro!
Related Post: Best Bumper Guards
Step 1: What You Will Need
Before you start your epic fixing job and turn that bust up bumper into something beautiful, it’s time to get your supplies in order. To get rid of those unsightly scratches you will need:
- Factory quality spray paint
- Spray primer for cars
- Clear coat spray
- Fine and coarse sandpaper
- A microfiber towel or cloth for cleaning
- Grease/wax remover
- Putty to fill scratches
- Safety gear like gloves, glasses, and a mask if you want to avoid injury, or excess debris flying around.
- And most important of all, a can-do attitude so you can fix that bumper like a pro!
Related Posts: Best Clear Coats for Cars and Best Random Orbital Sanders
Step 2: Clean the Bumper
The first thing you’ll need to do is wash your car, or at least the section you are working on. Your vehicle needs to be free of dirt, oil, tar, and wax before you start the job. Once you’ve washed it, you can also prep your vehicle with a special plastic solvent. This will remove any excess dirt and oil and will also prep the bumper for adhesion. Make sure your bumper is dry before you start fixing those scratches.
Related Post: Best Pressure Washer for Car Cleaning
Step 3: Isolate the Area
Next up you want to isolate the area that you’re working on so that you can protect the non-damaged parts of the bumper when you’re sanding. A handy way to do this is to stick masking tape around the area. This will protect the paint and enable you to fix the damaged part without causing further damage to the rest of the bumper.
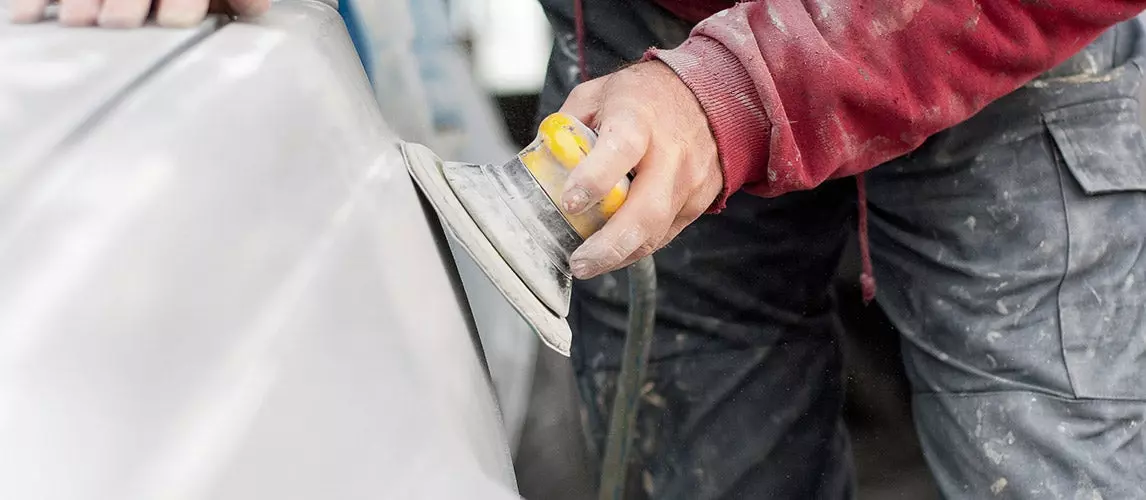
Step 4: Get Your Sanding on!
Next, you need to sand the scuffed or dented area so that the surface can be levelled. You’ll want to maintain a firm pressure while you do this, and the severity of the scratch will determine what grit you need. For lighter scratches use 400-800 grit sandpaper and for bigger scratches use 100 – 200 grit. You’ll need to sand the area until you have smoothed the scratches.
- Sand paper grit simply refers to how many particles of sand there are in every square inch of sandpaper. Course sandpaper is usually 40-60 grit, while super fine sandpaper is usually 360 – 600 grit. Course sandpaper is great when you need to heavily sand and strip, while finer sand paper is better for removing smaller imperfections and finishing jobs.
Step 5: Fill Those Scratches
Some scratches might be too deep and won’t disappear completely when you sand them. In these cases, you will need to invest in some polyester filling putty. You will want to mix it on a clean board that if fibre free to ensure an even mixture. Mix the required amount of putty and hardener and using a spreader apply the putty mix evenly onto the scratch. By applying it firmly and evenly you will increase the chances of adhesion and prevent possible air entrapment.
Once you have spread your putty over the scratch evenly, let it dry for 30 minutes (or the designated time on the instruction sheet).
Once the putty has dried, you’ll need to get sanding again. This time use sandpaper with a grit of about 180. Sand until smooth and then wipe the surface to ensure all the debris have been removed. For the next part of the task, you’ll want a clean bumper surface.
Step 6: Prime That Surface
Once your putty has dried you will want to use a surface primer/undercoat spray on the area. A primer is super important as it ensures adhesion of the paint and prolongs the paint’s durability. It also provides better protection to your bumper.
You will need three coats of primer. Spray the primer from a distance of about 15 centimetres to ensure a smooth application and allow each coat to dry before applying the next layer of primer. This will usually take about 15 minutes. Once you have sprayed all three coats of primer on the area, you’ll need to let it seriously dry out before sanding it again. Give it about 8 hours to completely dry.
Step 7 : Sanding Round 2
Once your primer has dried, it’s time to whip out your sanding block once again before you can paint your bumper. This time you’ll be using a finer sandpaper of about 400-grit to really finish off that area smoothly. Make sure all the edges of the work area are well sanded and once you’re satisfied with the texture, clean the area once again to ensure you get rid of all those small particles.
Step 8 : Unleashing Your Inner Artist (painting time!)
You’ve cleaned the bumper, sanded it, primed it, sanded it again, and now it’s finally time to bring out your inner Picasso and get painting. However, like all the other parts of the task, this requires a few steps.
- First things first, cover the area that isn’t being painting to ensure that you don’t get excess paint on other parts of your vehicle. You can use masking tape and newspaper for this.
- Give the area a final clean with a damp towel/cloth to ensure the surface is ready for paint.
- Once dry, it’s time to apply the spray paint. Apply several coats from a distance of about 10 centimetres and ensure that you’re using a smooth sweeping motion. By maintaining an even distance you’ll prevent the paint from dripping. As you did with the primer, allow each coat to dry for about 15 minutes.
- Once dry, it’s time to apply 2 coats of clear coat. This is simply a transparent paint that protects the color. Spray it from 10 centimetres away like you did the paint. Allow 15 minutes between coats and another 15 once you’ve finished with the clear coat.
- Finally, apply your blending solvent to remove any overspray.
And that’s it! You have officially fixed your bumper scratch like a pro and can now drive around in style once again. It’s a good idea to keep these materials safe, since bumper scratches are an inevitable part of being a driver.
Related Post: Best Car Scratch Removers
Source:
- How to Easily Fix Bumper Scratches at Home – Endurance Warranty