You decided to upgrade your car audio system because you want to get a feel of a high-quality sound system? Our number one tip for saving money while doing this is to ensure you get it right the first time.

We can’t stress this enough as most of us seem to make the mistake of buying the wrong audio system. In this article, we have put together some useful tips that will help you make a wise decision when you want to upgrade your car audio system.
1. What Does A Car Audio System Consist Of?
A car audio system is made up of different components which work together as a unit. A simple car audio system includes three main components while a more advanced car audio system will have additional components working with these three. The three most important components of the system are the following:
The Head Unit
While this name is not common, a lot of people know this component as the car radio. The primary function of this component is to provide an audio signal. It consists of digital music, satellite radio, CD players, internet music, and more.

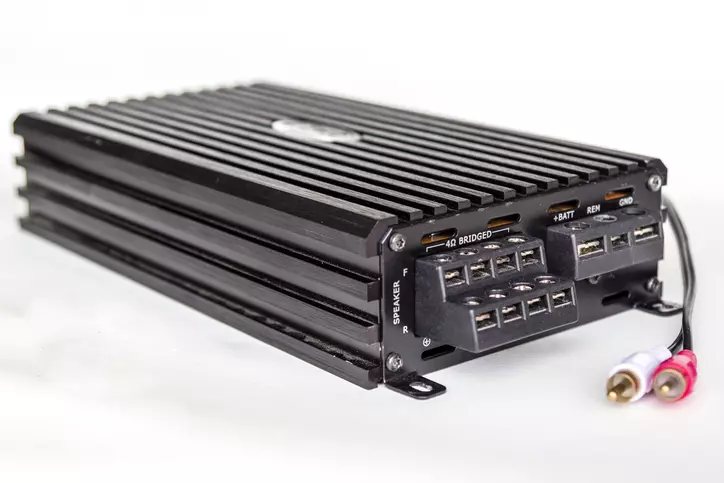
The Amplifier
This component often goes unnoticed since a lot of OEM car audio systems have the head unit and amplifier as a single component as a means to conserve space. The function of the amplifier is to boost the audio signal created by the head unit, so it is powerful enough to cause movements in the speakers.

Car amplifier
The Speakers
Audio signals are usually formed as electrical signals in the head unit, boosted by the amplifier, and then converted to mechanical energy to cause vibrations in the speaker. These vibrations display air to produce sound. Car speakers are often full-range speakers. They can also be coaxial, woofers, subwoofers, etc.

Full-range speakers
Other components which are added in an advanced car audio system include:
- Crossovers
- Bluetooth
- Sound processors
- List Element
2. Facts About A Car Audio System
#1 Your car audio system is built around the head unit. It is the core component of the system.
#2 The OEM audio system is not installed as a permanent audio system, and it is easy to replace them with aftermarket parts. All you need to do is ensure that they are of the same size so you can install the new one into the space occupied by the OEM system in your car.
#3 It’s not in all cases that you will have an OEM system with poor sound quality. Some OEM systems which offer some great quality sound include Bose systems, Bowers & Wilkins, Revel systems, Fender, etc.
#4 Amplifiers are often built into the OEM head units for some cars while they are absent in others. This difference is indicated by the names they are called. When the amplifier is built in, it is referred to as a receiver while in a case where it is not, it is called a turner.
#5 Money may not always solve the problem of your sound quality. 50% of how great the quality of the sound you can get often depends on how the speakers are arranged and the location in the car.
#6 There is a range of audio frequency available and using a full range speaker lets you capture frequencies throughout this range. This is why full range speakers are used in lots of OEM speakers. The only problem which makes them ineffective is that they lose sound strength because they are placed relatively close to one another, and the size of the speakers also causes interference between them.
#7 By installing a subwoofer, you can achieve the perfect car audio system which you desire.
3. Why Should You Upgrade Car Audio System?
There are lots of reasons why you will need to upgrade your car audio system. Here are some of the common reasons why people do it:
-
As newer model cars are being released, there are also advancements in the technology of car audio systems. There are new additions and also improvements on the features which are available.
If you wish to have an audio system that is compatible with your smartphone, connects to the internet, Bluetooth enabled, has USB ports, or HD radio, you will need to upgrade your system. This is unless you wish to buy a brand new car just for the radio.
- While most OEM audio systems come with great speakers, the potential is often limited by the low-power amplifiers that come with it. This is one major reason why you will need an upgrade.
- To conserve the space available in the car during manufacture, most OEM car audio systems make use of full-range speakers. As a result, the sound quality is low. Upgrading the car audio system gives you the option of using a coaxial speaker. Coaxial speakers can handle a broad range of audio on the individual speakers to give you the best quality of sound.
4. Where To Start?
To begin the upgrade of your car audio system, you need to have certain areas taken care of if you wish to achieve your objectives. Below we have given some areas which you have to address to get the best out of an upgrade.
Map Out Your Budget
If you know how much you are willing to spend upgrading your car’s audio system, you can get the most out of your money. Having a limit to what you pay will stop you from spending on components that are not necessary for your current upgrade.
What Do You Need In An Audio System?
Depending on the kind of music you listen to and the depth to which you wish to hear the details, the configuration of your car audio system will have to change. Speakers, head units, and amplifiers for different styles of music will be different, and by carrying out extensive research, you can purchase components that align with your needs.
Enlighten Yourself on the Features of the OEM System of Your Car
By doing this, you can learn about all the features which you have available, features you lack, and the extent to which they will be able to satisfy you. This is a good way to determine the parts that will need to be changed.
In some OEM systems, features like built-in Bluetooth, GPS navigation, internet connectivity, and mobile hotspots are made available while in others you may get one or none of these functions. You may also have a built-in subwoofer and an amplifier in the system.
Speakers play a significant role in the sound quality of the audio system. There are also different speakers which will work better for different types of music. You need to understand yourself better to get the right choice of speakers. Define your kind of music, and this will help to narrow down your options of speakers.
5. The Tools You Need To Install Car Audio System
Installing a car audio system can be done easily and safely if you have the right tools for the job. If you wish to install it on your own, the following tools are essential to do the work:
- Solder iron
- Crimpers
- Heat gun
- Wire stripper
- Cable cutter
- Solder
- Sound meter
- Torx Bit
The tools listed above are some of the essential tools you will need for the job. In some cases, you may also need additional tools like screwdrivers, saws, etc. in case you want to install your speakers in a different location. In such situations, you may need to open the panels and also pass wires through areas that you can’t easily get access into.
6. Our Advice before Getting Down to Business
Getting overexcited by the idea of upgrading your car audio system may cost you money that you can invest in other areas. This may happen if you don’t carry out proper research and learn more about your car audio system before you decide it needs an upgrade. Here are some areas you should consider before diving into this project:
- Newer model cars often come with improvements in their audio system. You will likely have an audio system which has a Multimedia DVD receiver, MP3 player, Bluetooth functionality to give you the option of making calls hands-free, a GPS navigation system, and USB direct control for iPod/iPhone. On such systems, it is sure that you will enjoy the functions available.
- Newer model cars often come with improvements in their audio system. You will likely have an audio system which has a Multimedia DVD receiver, MP3 player, Bluetooth functionality to give you the option of making calls hands-free, a GPS navigation system, and USB direct control for iPod/iPhone. On such systems, it is sure that you will enjoy the functions available.
- Creating an advanced audio system with component speakers by installing crossovers, sound systems, and equalizers are the best option for music enthusiasts who are after the best quality of sounds.
7. Upgrade Head Unit

Single DIN Head Unit
Below are some important factors you want to consider before upgrading your car’s head unit.
How To Choose The Right Head Unit?
The Average Cost of An Aftermarket Head Unit
Before choosing the right head unit for your car, you want to figure out the cost of the unit and also the cost of installation. Do keep in mind that there are different types of units, which may vary in price, depending on the type of model you want to buy.If you decide to do the installation yourself, then you might be spending from $70-$300 for the single DIN head unit compared to a double DIN head unit with touch screen, which happens to be a bit pricier. But if you choose to get the installation done on an Audio shop, then you might spend more than that price for a brand new head unit and installation.

Double DIN Head Unit
Type of Specific Unit to Your Car
Make sure you measure the installed OEM Factory-installed unit before picking an aftermarket one. Based on their dimension standards, they are divided into two parts: We have the Single Din Car Radios, which is 2-inch high and 7-inch long, and the double din car radio that is 7 inches long and 4 inches high. You can replace a double-DIN OEM head unit with a single DIN head unit and Double DIN aftermarket.
Head Unit with Preamp Output
While looking for the right head unit, you may want to go for preamp output. The reason why this head unit seems to get the cake is that they come with a separate analog circuit for both positive to negative connections from the XLR input to its output. Their differential socket provides a significant advantage by reducing noise and distortion.
How to Install?
The needed tools include:
● A Socket
● A screwdriver set
● Wiring harness adapter
● Electric Tape
● Dashboard installation kit
● And any additional tools to remove the factory head unit.
Step 1: Make sure all your tools like a faceplate or mounting sleeve are in place.
Step 2: The negative terminal wire should be disconnected from the battery.
Step 3: Next, detach the old unit from your vehicle’s dashboard
Step 4: Ensure the surrounding trim is removed in order to access it.
Step 5: Right from the back of the head unit, ensure you disconnect the wiring harness by pressing down the tab.
Step 6: Make sure you are using the right harness adapter.
Step 7: Next step is to disconnect and loosen the antenna while pulling out the connector.
Step 8: Then prepare the head unit to fit in, based on how the original unit was positioned.
Step 9: You can use the factory brackets or the one that comes with the new dash kit plug.
Step 10: The next step to plug the wiring adapter into your factory plug.
Step 11: Insert the new head unit plug to both the black and brown connector on the adapter.
Step 12: Fix the new head unit into your vehicle’s dashboard location.
Step 13: After that, connect the wiring harness and plug in the Athena.
Step 14: Reconnect the negative battery terminal and reassemble the dashboard.
Step 15: Turn on the unit, and find out if all functions such as USB, Radio, and rear speakers are in good condition.
Common Mistakes
One of the mistakes people make installing a head unit is the failure of getting all the wires of equal length. When you do that, it makes it a little bit easier and quicker when you do the install.
- Failure to use Buck connectors, soldering, and Shrink tubing. If you want to make it quite easy and quick for you to install, use Buck connectors, soldering, and shrink tubing.
- Forget to unhook the battery while installing.
- Failure to match each wire to their specific color.
Make sure you wire all colors based on colors, matching the similar wires to the same colors.
8. Upgrade Amplifier

4 channel amplifier in its installed below the seat
How to choose the right amplifier?
The way you can get a perfect sound is if decide to go for an upgrade. And that is what we are going to help you do. Below are some tips you have to keep in mind when choosing an amplifier.
Average Cost of the Amplifier
Before choosing an amplifier, you want to find the average cost of the Amplifier. You also want to find out if the price range falls within your budget. The average cost of high-quality Amps ranges from $50 to $200 currently on Amazon.You also want to figure out if the manufacturer offers a free installation service alongside the product. If they don’t provide such services, then you may end up spending an extra buck of $30-$60 for a single installation.
The Type of Amplifier
Before buying an aftermarket car amplifier, you need to figure out the number of speakers you want to install on your vehicle. Are you going to be needing a pair of speakers or two pairs of speakers? Knowing this will help you make an informed decision on the type of amp to buy based on the output channels and the power of the amp. Currently, on the market, the mono amplifier uses one output channel known for powering subwoofers. And two channels Amp delivers more versatility which you can use to power a pair of speakers.3 and 4 channel Amps is known to have the most options. You can easily use them to power a couple of pairs of speakers. Apart from those, 5 to 6 Amps channels allow you to power your system using a single amplifier.
How to Install?
Below is what it takes to install a car amplifier in your vehicle.
Step 1: Ensure you purchase a wiring kit that has ground and power wire, speaker wires, and fuses for installation.
Step 2: Ensure you mount the amplifier in a good spot for proper ventilation without being too difficult to access.
Step 3: While installing the unit, make sure you disconnect the negative terminal.
Step 4: Pass the wire cable from the battery to the amplifier and strip the insulation of both the battery and amplifier.
Step 5: Connect the fuse holder to the wiring kit and terminal ring after gripping them together.
Step 6: Attach the terminal ring to the positive battery terminal, and securely melt the dude holder.
Step 7: Since the dud and the lead between the terminal are unprotected, ensure the fuse is close securely to the battery.
Step 8: Run the power cable to the cabin tuck in a convenient place in your vehicle to reach your amplifier location.
Step 9: Run the signal cables and turn on the wire behind your stereo.
Step 10: The ground wire should be connected to the vehicle chassis and fasten the ground cable with a bolt.
Step 11: Connect the vehicle’s bare metal with the ground wire for the best connection.
Step 12: Now, you want to mount your Amp and carry out the necessary connections.
Step 13: Ensure you turn the amp’s gains down before you fire up an empty test.
Step 14: After that, you want to reconnect the negative battery terminal of your vehicle.
Step 15: Ensure the amps are on when you start the car.
Step 16: Finally, play some good music and see how it goes.
Common Mistakes
- Hooking Amps with smaller wires can blow up your amplifier.
- Don’t have your amplifier on a wet trunk or connect it with a sub-par cable as water can cause damage to it.
- Don’t use wires that are cheap or that are made from aluminum. You can use an Oxygen-free copper wire instead.
9. Upgrade Speakers

Coaxial speakers system
Improving your vehicle’s speaker system will not only revolutionize it but also gives you the best-desired quality sound. Unlike factory speakers, most aftermarket speaker systems offer high-quality material that is strong enough to withstand any warping and can play louder as well as deliver smooth sounds.
How to Choose The Right Speakers?
Consider the Cost and Model
There are basically three main types of speakers based on their cost. We have full-range speakers, coaxial, and component speakers. A full range speaker system offers an all-in-one part that is easy to install and the cheapest on the market. Regarding the sound, they can produce a different range of sounds. The only limitation is that they aren’t customizable like component speakers, which are higher priced than full-range speakers. Unlike full-range speakers, the coaxial speaker, on the other hand, has two drivers that use the same coil voice. Most OEM system does come with either a full range or coaxial speakers. So, the point here is to go for what suits you. If you are looking for an advanced set of speakers, then you can as well want to choose from either coaxial or component speakers.
Consider the Sound Quality of the Speaker
Before making a buying decision make sure you find the type of speaker that fits your needs. Ensure you buy a speaker that will fit your favorite music. An aftermarket speaker offers better quality material. Find out if it has an MRC Cone, Mica Reinforced Cone. Ensure the speaker has a tweeter and a much larger voice cone, which will allow the speaker to hold way more power. That means you are going to get higher sound quality and frequency.
How to Install?
For easy installation, you are going to need the following tools:
● Socket Wrench
● Standard Philips Screwdriver
● TI5 Torx screwdriver
● Panel Tool
● Flush cut pliers
● Until Knife Razor Blade
Step 1: Disassemble the speaker by removing the panel. Take note of all screw locations.
Step 2: Using the approximate tools, remove each tool
Step 3: Using the plastic panel and popping tool loosen the panel.
Step 4: Make sure you disconnect the wire harness before finally removing the panel.
Step 5: Next, eliminate the screws holding in the factory-installed speaker.
Step 6: Remove the speaker from the door and disconnect the factory speaker harness from the system.
Step 7: Make sure the kit’s speaker harness fits the factory connector before connecting the speaker harness.
Step 8: To ensure that the power window doesn’t accidentally lock or hook the wires when installed, secure the wire zip ties.
Step 9: After that, plug the speaker into the battery connector.
Step 10: Insert the speaker into the cavity lineup and screw it.
Step 11: Reattached the wire harness and lineup the panel.
Step 12: Push the door in until it clips back into place.
Step 13: Reattach all other panel screws and covers on the door.
Step 14: Make sure you reconnect the lock switch before you are done.
Step 15: Repeat this process for other doors you wish to install speakers into.
Common Mistakes
One mistake most of us make while installing a speaker in our car is the wiring issue. Make sure you double-check to see if the speakers have the same polarity. The same goes for subwoofers.
If you have multiple subwoofers, you want to make sure they are also wired with incorrect polarity. The reason for this is that if you have one speaker while it is going out and the other one is coming in, then the speakers will be working against each other. The best way to check the polarity of those wires is through a polarity checker.
10. Conclusion
Having a great car audio system can make the ride home to and from work or an outing a pleasant experience. Unfortunately, this may not always be the case if you are stuck with a low-quality OEM system. In such a situation, making a few adjustments and replacing a few components can solve your problem.
We have given you our ideas on what we know based on our experiences and research. By applying the tips and learning some of the information in this article, you will be able to get improvements in your car audio system.